Sourdough Bread Recipe: Easy No Knead Dutch Oven Loaf
The Short Answer
This is a four ingredient no knead sourdough bread recipe designed for beginners. You need an active sourdough starter, strong bread flour, water and salt. Mix the dough, rest it, do a few simple stretch and folds, cold proof overnight in the fridge, then bake in a preheated Dutch oven. Total hands on time is around 20 minutes. The rest is just waiting.
In This Sourdough Recipe Guide
Baking your first sourdough loaf can feel daunting, but it does not need to be. This recipe strips everything back to the basics and focuses on what actually matters for a beginner: a reliable method, simple ingredients and a result you will be proud of.
This is a no knead recipe. Instead of kneading, we use a technique called stretch and fold, which takes about 30 seconds at a time and does the same job. The dough does most of its work overnight in the fridge, developing flavour slowly while you sleep. When it comes to baking, a Dutch oven does the heavy lifting by trapping steam and creating the conditions for a proper crust and open crumb.
Before you bake, make sure your starter is fully active and doubling reliably after feeding. If you are not sure, read our guide on how to activate your sourdough starter first. Also worth reading: is sourdough bread better for you and why the long fermentation method used in this recipe makes a genuine difference.
Before You Start: Is Your Starter Ready?
The single most common reason a beginner sourdough loaf does not rise is that the starter was not active enough when it was added to the dough. Before you mix anything, check these three things.
Your Starter is Ready to Bake With When:
- It has been fed within the last 4-8 hours and is at or near its peak rise
- It has doubled in size since its last feed and is visibly bubbly throughout
- A small spoonful dropped into water floats to the surface
- It smells pleasantly tangy or yeasty, not like acetone or nail polish
If your starter is not showing these signs, feed it once or twice daily for 2-3 days at room temperature before attempting this recipe. A loaf baked with an underactive starter will be flat and dense. It is worth the extra wait.
Choose Your Sourdough Starter
This recipe works with all of our NutriBrew heirloom starters. Each one produces a slightly different flavour profile and crust character. Here is a quick guide to help you choose.
San Francisco
Flavour: Classic tang, well balanced acidity
Best for: White boules, airy open crumb
Classic White
Flavour: Mild, slightly sweet, light tang
Best for: Everyday loaves, pizza, focaccia
Old World Rye
Flavour: Deep, earthy, bold and robust
Best for: Dark rye loaves, hearty bread
Alaskan Heirloom
Flavour: Complex, tangy, strong rise
Best for: Cold kitchens, vigorous bakers
Colorado Brown
Flavour: Nutty, wholesome, rich crumb
Best for: Wholemeal and artisan loaves
Gluten Free
Flavour: Clean, mild, naturally lighter
Best for: Gluten free and coeliac baking
Ingredients and Equipment
This recipe makes one medium loaf. It scales easily if you want to make two loaves at once, simply double everything.
| Ingredient | 80g Starter, Medium Loaf | 160g Starter, Large Loaf |
|---|---|---|
| Active sourdough starter | 80g | 160g |
| Strong bread flour | 333g | 500g |
| Filtered water | 250g | 375g |
| Fine sea salt | 8g | 11g |
| Loaf size | 1 medium loaf | 1 large loaf |
- Starter must be fed and at peak activity, bubbly and doubled before use
- Use organic unbleached flour that matches your starter variety
- Weigh water in grams, 1ml equals 1g, always use room temperature water
- Salt controls fermentation rate and strengthens the dough structure
Equipment You Need
- Kitchen scales, weighing by grams gives consistent results every time
- Large mixing bowl, the dough will roughly double in size during bulk fermentation
- Dutch oven, minimum 2.5 litre capacity with a lid. Cast iron is ideal
- Baking paper, for transferring the dough into the hot Dutch oven safely
- Dough scraper or wooden spoon
- Sharp knife or bread lame, for scoring the dough before baking
- Rubber band or marker, to track the rise during bulk fermentation
NutriBrew Tip: Using 160g of starter instead of 80g speeds up fermentation, which is useful in a cooler kitchen or when you want to bake sooner. If your kitchen is warm above 22°C, stick to 80g to slow things down and prevent over proofing.
The Full Baking Timeline
Here is the full process from start to finish. You can start in the morning and bake the following morning, or start in the evening and bake the next evening. Either works.
| Stage | What Happens | Time |
|---|---|---|
| Feed your starter | Feed your starter and wait for it to reach peak activity | 4-8 hours, 2 mins hands on |
| Mix the dough | Combine flour, water, starter and salt | 5 mins hands on |
| Rest | Cover and leave the dough to rest, flour fully hydrates | 30 mins, no action needed |
| Stretch and fold | 4 sets of stretch and folds, one every 30 minutes | 2 hours, 2 mins hands on total |
| Bulk fermentation | Dough rests and rises until increased by around 50% | 2-4 hours, no action needed |
| Shape | Shape the dough into a round boule | 5 mins hands on |
| Cold proof | Shaped dough rests in the fridge overnight, flavour develops slowly | 8-16 hours, no action needed |
| Preheat and bake | Preheat Dutch oven, score dough, bake covered then uncovered | 60-70 mins, 10 mins hands on |
| Cool before cutting | Rest on a wire rack before slicing, this is important | 2 hours minimum, no action needed |
Step by Step Sourdough Bread Method
Step 1: Mix the Dough
In a large bowl combine your active starter and water. Mix briefly until the starter is dispersed. Add the flour and salt and mix until no dry flour remains. The dough will be rough and shaggy at this stage, that is completely normal. Cover with a damp cloth or cling film and leave to rest at room temperature for 30 minutes. This rest period allows the flour to fully absorb the water and gluten to begin forming on its own.
Step 2: Stretch and Fold
This is where the dough develops its strength, without any kneading. Perform 4 sets of stretch and folds, one set every 30 minutes over 2 hours.
How to stretch and fold: With wet hands, grab one side of the dough, stretch it upward as far as it will go without tearing, then fold it over to the opposite side. Rotate the bowl 90 degrees and repeat. Do this 4 times per set, rotating the bowl each time. The dough will become noticeably smoother and more elastic with each set.
Step 3: Bulk Fermentation
After your final stretch and fold, cover the dough and leave it at room temperature until it has increased in size by around 50%. This typically takes 2-4 hours at 18-22°C. Mark the starting level with a rubber band or tape on the outside of the bowl so you can track progress clearly. The dough is ready when it looks puffy, has visible bubbles on the surface and has grown by roughly half.
Step 4: Shape the Dough
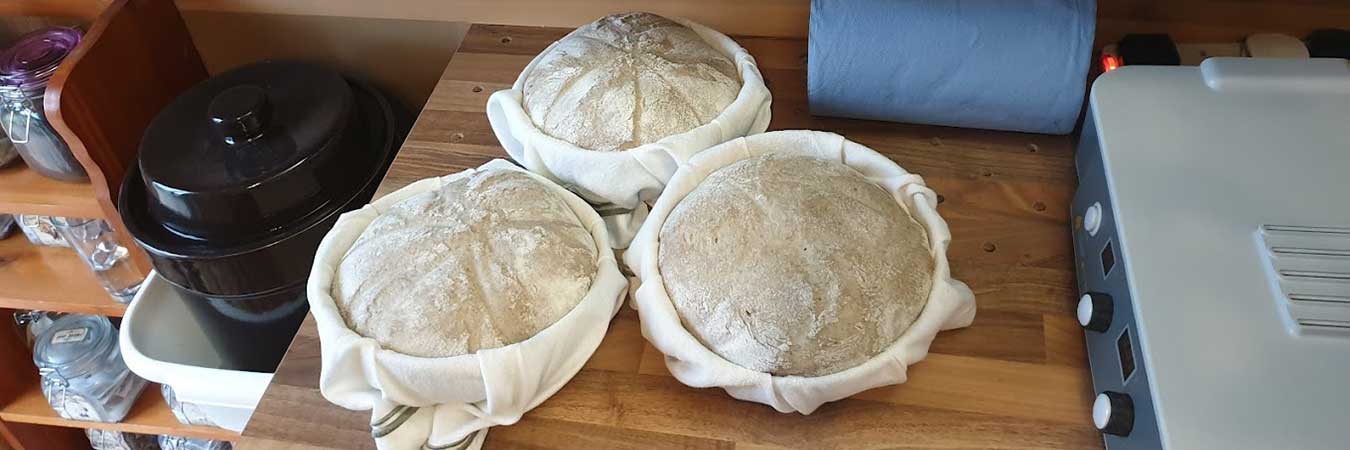
Lightly flour a clean surface and turn the dough out. Using a dough scraper or your hands, gently pull the edges of the dough toward the centre, then flip it over so the smooth side faces up. Using both hands, cup the dough and drag it toward you in small circles to create surface tension across the top. This tight surface is what helps the loaf hold its shape and spring up in the oven. Place the shaped dough seam side up in a floured bowl or banneton, cover and place in the fridge for 8-16 hours.
Step 5: Preheat the Dutch Oven
When you are ready to bake, place your empty Dutch oven with the lid on in the oven and preheat to 230°C for at least 45 minutes. The Dutch oven must be scorching hot before the dough goes in. This is what creates the burst of steam that produces the open crumb and crispy crust.
Step 6: Score and Bake
Take the dough straight from the fridge. Turn it out onto a piece of baking paper and dust the top lightly with flour. Using a sharp knife or bread lame, score a line or cross about 1cm deep across the surface. This controls where the loaf expands in the oven and gives it that classic sourdough look.
Stage 1, lid on: Carefully lower the dough on its baking paper into the hot Dutch oven. Place the lid on and bake for 25 minutes. The trapped steam mimics a professional bread oven and allows the loaf to expand fully.
Stage 2, lid off: Remove the lid and bake for a further 20-25 minutes until the crust is deep golden brown. The internal temperature should reach 95-99°C when fully baked.
Step 7: Cool Before Cutting
Remove the loaf from the Dutch oven and place on a wire rack. Do not cut into it for at least 2 hours. This is one of the most important steps and the most tempting to skip. The bread continues to cook internally as it cools and the crumb sets during this time. Cutting it too early releases steam and leaves you with a gummy, doughy interior. Wait. It is worth it.
NutriBrew Tip: To prevent a burnt bottom, place a second baking tray on the shelf below your Dutch oven to deflect direct heat from the bottom element. A thin layer of semolina or cornmeal under the baking paper also helps.
No Dutch Oven? Here is What to Do
A Dutch oven produces the best results but it is not the only option. The key is trapping steam around the dough during the first stage of baking. Here are two alternatives that work well.
Option 1: Roasting Tin with a Lid
A heavy roasting tin or casserole dish with a tight fitting lid works as a substitute. Preheat it the same way and follow the same two stage baking process.
Option 2: Baking Tray with Steam
Place your dough on a baking tray lined with baking paper. At the same time, place a deep tray of boiling water on the shelf below. The steam it produces replicates the enclosed environment of a Dutch oven. Bake at 230°C for 45-50 minutes, removing the water tray after the first 20 minutes.
Sourdough Bread Troubleshooting
| Problem | Likely Cause | Fix |
|---|---|---|
| Loaf is flat with no rise | Starter was not active enough when mixed into the dough | Feed starter daily for 2-3 days and use only when it is doubling reliably after each feed |
| Dough too sticky to shape | High hydration dough is naturally sticky for beginners | Use wet hands rather than floured hands. Work quickly and confidently. It gets easier with practice |
| Gummy interior after baking | Loaf was cut too soon after baking | Wait at least 2 hours on a wire rack before slicing. If still gummy after cooling, increase lid on bake time by 5 minutes next time |
| Burnt bottom | Dutch oven sitting directly on a hot element | Place a baking tray on the shelf below the Dutch oven to deflect heat from the bottom |
| Bread tastes very sour | Starter was overly acidic or dough was over fermented | Use starter sooner after its feed, at or just before peak. Reduce cold proof time by 2-3 hours |
| Crust is too thick and hard | Overbaked in the lid off stage | Reduce the uncovered bake time by 5 minutes and check the colour earlier. Every oven runs slightly differently |
Frequently Asked Questions About Sourdough Bread
How long does sourdough bread take to make?
From start to finish the process spans around 24 hours, but most of that is resting and fermenting time with no involvement from you. The actual hands on time is around 20 minutes in total. You can start the dough in the morning and bake the following morning, or start in the evening and bake the next evening.
Can I make sourdough bread without a Dutch oven?
Yes. A roasting tin with a tight fitting lid works well as an alternative. You can also bake on a tray with a separate tray of boiling water placed below it to create steam. The Dutch oven gives the best results but it is not essential, particularly for your first few bakes.
Why did my sourdough not rise?
The most common reason is an inactive starter. If your starter is not doubling reliably within 4-8 hours of a feed, it is not ready to leaven bread. Feed it daily for 2-3 days at room temperature before trying again. Temperature also plays a role. If your kitchen is below 18°C the dough will ferment very slowly and may not rise enough before baking.
Can I use wholemeal or rye flour in this recipe?
Yes. You can substitute up to 30% of the strong white bread flour with wholemeal or rye flour without changing the method. Using more than 30% wholemeal will produce a denser loaf and you may need to adjust the water slightly as wholemeal flour absorbs more liquid. If you are using a rye or Colorado Brown starter, a blend of white and wholemeal flour works particularly well.
How do I store sourdough bread?
Store your sourdough at room temperature wrapped in a clean cloth or beeswax wrap for up to 4-5 days. Avoid plastic bags as they soften the crust. For longer storage, slice the loaf and freeze it. Individual slices can be toasted straight from the freezer.
Have more questions about your sourdough starter?
Visit our dedicated sourdough starter FAQ page for answers to every common question about feeding, storing and troubleshooting your NutriBrew starter.
Everything You Need for Sourdough Success
From activating your first starter to baking your best loaf yet.